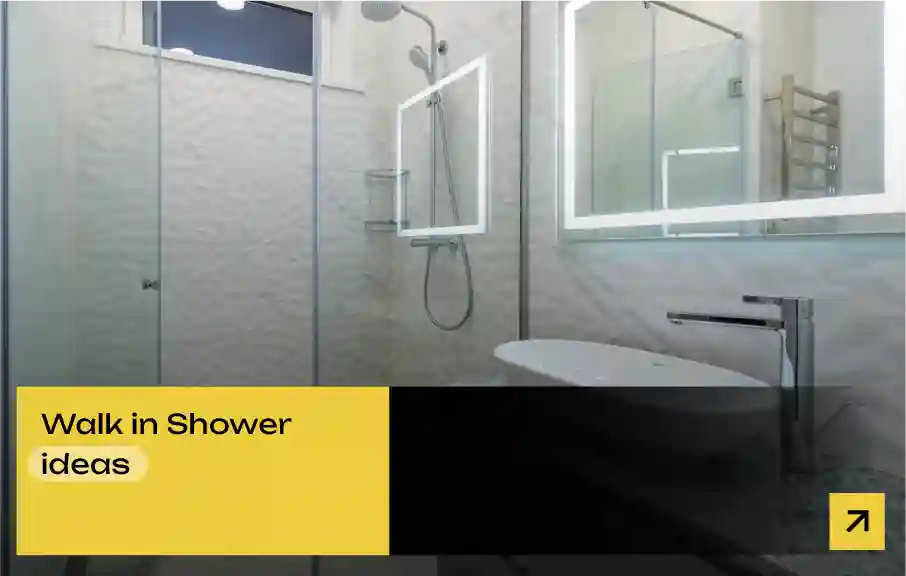
Walk-In Shower Ideas: Doorless, Curbless & Small-Bathroom Designs
Walk-in showers are having a serious moment, and honestly, it makes sense. No door to squeegee, no curb to trip over, and a way cleaner look overall. But before you rip out your tub, it’s worth knowing what actually works for your space, and what the trade-offs are.
Written by the Tdot Build team, Toronto & the GTA. We’ve built custom walk-in showers across Scarborough, North York, East York, Vaughan, and Woodbridge for over 20 years. We’re licensed and insured, and we build every shower properly waterproofed from the studs out, not just tiled to look good.
This guide covers doorless and curbless designs, small-bathroom layouts, aging-in-place options, tile and glass ideas, and the honest pros and cons. Real project photos, real advice, no fluff.
Whether you’re working with a tiny condo bathroom or a spacious primary ensuite, there’s a walk-in shower style that fits. Let’s get into the ideas.
Walk-In Shower Ideas (Start With Your Space)
Before you fall in love with a Pinterest photo, figure out what your bathroom can actually support. Here’s the quick framework:
- Small bathroom? Go frameless glass or a half-wall to keep sightlines open.
- Older home with limited plumbing access? A curbless entry might need floor work, so plan for that.
- Want it accessible long-term? Curbless entry plus a built-in bench and grab bars is the move.
- Want it to feel like a hotel? A wet room or double shower setup is worth the extra space and budget.
Most bathrooms in the GTA can support at least one of these styles without a full layout overhaul. Let’s get into the details.
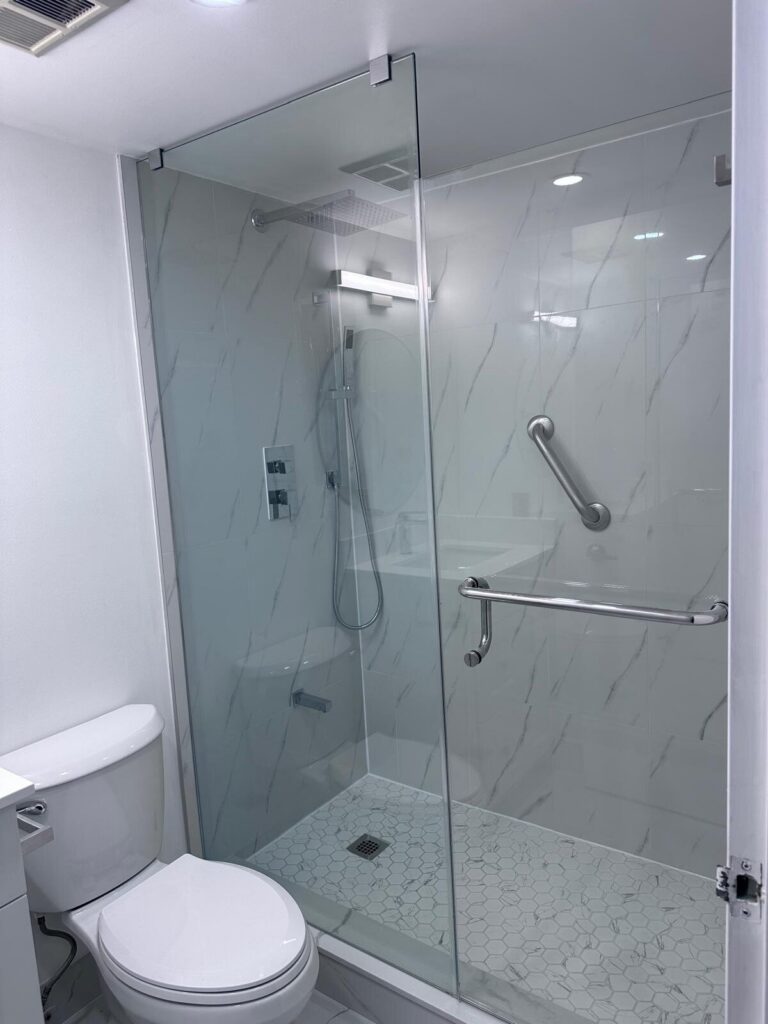
Doorless & Curbless Walk-In Showers
This is the look everyone’s after right now, and it’s easy to see why. No door means no glass to clean, no hinges to maintain, and a way more open feel, especially in a smaller bathroom.
Doorless showers work by using an angled entry or a partial glass panel to control splash instead of a full door. Curbless means the shower floor is level with the bathroom floor, no step up or down. Together, they create that seamless, spa-like look you see everywhere online.
Splash control is the main thing to get right. A well-placed shower head, a slightly wider entry, and correct floor slope all work together to keep water where it belongs. This isn’t a DIY guess-and-check situation. It needs to be planned properly before tile goes down.
Curbless entries suit some homes better than others. Homes with a concrete slab foundation usually have an easier path to curbless, while homes with a wood subfloor may need extra floor prep to get the level transition right. Either way, it’s doable in most GTA homes with the right approach.
One thing worth knowing upfront: curbless doesn’t always mean a bigger budget, but it does mean more planning. The floor structure needs to be assessed before anything gets demoed, so the contractor knows exactly how much of a drop is available to work with. This is one of those “measure twice” situations where getting it right the first time saves a lot of hassle later.
Walk-In Showers for Small Bathrooms
Small bathroom, big shower energy. This is honestly one of the most requested looks we build, since it directly answers the “how do I make my tiny bathroom feel bigger” question.
The trick with small spaces is keeping sightlines open. Frameless glass instead of a full enclosure, light-coloured tile, and a shower that’s tucked into a corner instead of centred all help a small bathroom breathe. Skip busy patterns on the shower floor and keep grout lines minimal, since visual clutter shrinks a room fast.
A few small-bathroom specific tips:
- Use a half-glass panel instead of a full door to save visual and physical space
- Choose a linear drain along one wall instead of a centre drain, which frees up floor tile layout options
- Keep the shower footprint at least 32 by 32 inches for comfortable use, even in a tight layout
- Match your shower tile to your bathroom floor tile to blur the boundary and make the room feel bigger
Even a condo bathroom or a small older-home bathroom in East York can pull off a walk-in shower with the right layout choices.
Storage is another thing people overlook in small bathrooms. A recessed niche built into the shower wall gives you storage without eating into floor space, which is a much better move than a bulky corner shelf unit. It’s a small detail, but it makes a real difference in how functional and clean the finished space feels.
Accessible & Aging-in-Place Showers
Whether you’re planning ahead or making a change now, an accessible walk-in shower doesn’t have to look clinical. Done right, it looks just as sharp as any other design on this list.
The core features are curbless entry, a built-in bench, grab bars, and a linear drain. Curbless entry removes the trip hazard entirely, which is the single biggest safety upgrade you can make in a bathroom. A built-in bench (as opposed to a fold-down plastic one) gives you a place to sit without looking like a hospital fixture, especially when it’s tiled to match the rest of the shower.
Grab bars have come a long way too. You can now get them in matte black, brushed gold, and other finishes that actually match your fixtures instead of screaming “safety bar.” A linear drain along the entry wall handles water runoff cleanly with a level floor, so accessibility and style aren’t a trade-off anymore.
This is also a smart move if you’re planning to stay in your home long-term. Building it in now, while you’re already renovating, is a lot less disruptive than retrofitting later.
A lot of our clients call this “future-proofing” rather than an aging-in-place reno, and honestly, that framing fits better. Wider doorways, curbless entry, and blocking in the walls for grab bars (even if you don’t install them right away) cost very little extra during a renovation but save a ton of money and disruption if you ever need them down the line.
Tile, Glass & Finish Ideas
This is where your walk-in shower goes from “functional” to “wow.” A few finish choices make the biggest visual difference.
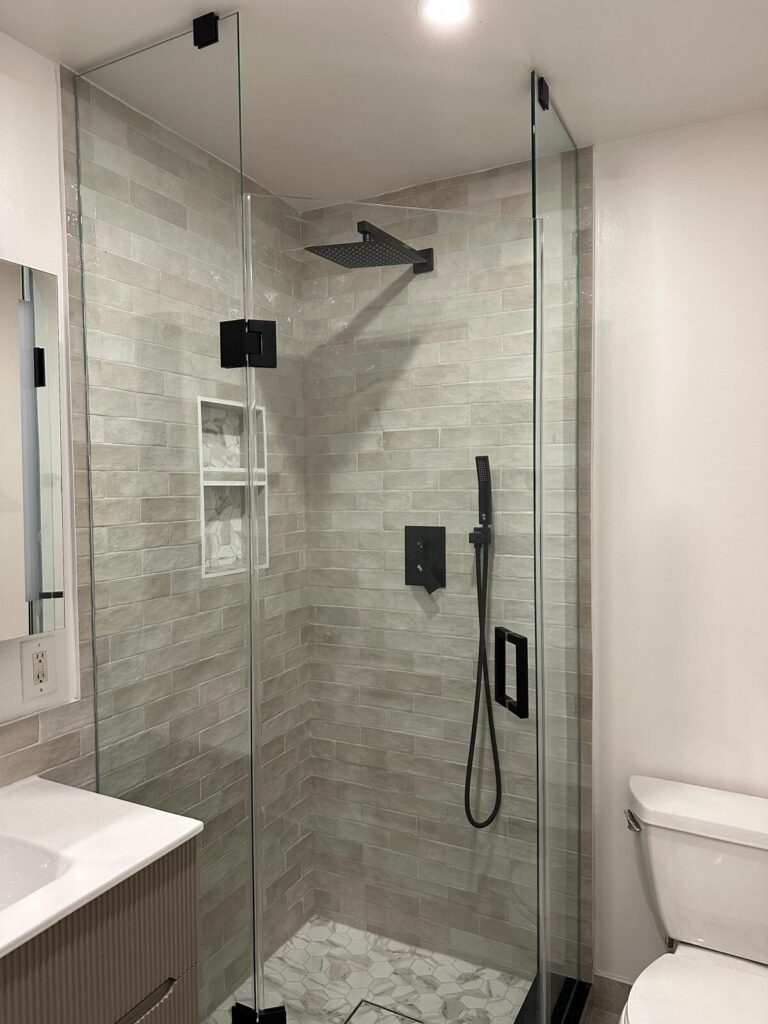
Large-format tile is the current favourite, since fewer grout lines mean a cleaner, more expensive-looking finish. It also makes cleaning way easier, which matters a lot in a wet space. If you want texture, save it for one accent wall or a niche instead of the whole shower.
Frameless glass panels are the go-to for a modern look, especially paired with black or matte hardware. A tiled niche for shampoo and soap keeps things clean-looking instead of relying on wire caddies. And if you want a design moment, a contrasting tile band or a mosaic floor pattern adds personality without overwhelming the space.
Quick comparison of popular finish combos:
| Style | Tile | Glass | Best for |
| Modern minimal | Large-format porcelain | Frameless clear glass | Small to mid-size bathrooms |
| Spa-inspired | Natural stone look tile | Half-glass or none | Larger bathrooms, wet rooms |
| Warm contemporary | Textured tile accent wall | Frameless with black frame | Any size, adds character |
Wet Rooms & Double Showers
If you’ve got the space, a wet room takes the walk-in shower concept to the next level. The entire bathroom floor is waterproofed, so there’s no separate shower enclosure at all, just an open, fully tiled room with a drain.
Wet rooms work best in larger bathrooms since they need enough space to keep water contained to one zone, usually with smart floor sloping and sometimes a half-glass divider. They’re a great fit for primary ensuites where you want a true spa feel.
Double showers, meanwhile, are perfect for couples or busy households. Two shower heads, a wider footprint, and sometimes a shared bench make mornings a lot less of a bottleneck. Both of these options need more square footage than a standard walk-in, so they’re best suited to larger bathroom renovations or additions.
Ventilation matters more in a wet room than a standard bathroom, since there’s more open water surface and no enclosure to contain steam. A properly sized exhaust fan keeps things from feeling humid and helps protect the finishes over time.
Pros and Cons of a Walk-In Shower
Let’s be real about this, because a lot of design blogs skip the downsides. Here’s the honest breakdown.
Pros:
- Easier to clean since there’s no door track or curb collecting grime
- Opens up the room visually, especially in small bathrooms
- More accessible for aging in place or mobility needs
- Looks modern and can boost resale appeal
Cons:
- Splash and heat retention can be an issue without proper planning, since there’s no door sealing in warmth
- No soaking tub, which can be a dealbreaker for some buyers if it’s your only bathroom
- Cleaning glass panels (if you have them) still takes some upkeep
- Can cost more upfront than a standard tub-shower combo, especially for curbless entry
For most homes with at least one other tub somewhere in the house, the pros outweigh the cons pretty easily. If this is your only bathroom and resale is a big concern, it’s worth chatting through the trade-offs before committing. A good contractor should walk you through this honestly instead of just pushing the trendiest option.
Tub-to-Shower Conversion: What’s Involved
Converting an old tub into a walk-in shower isn’t just a demo-and-tile job. Here’s what actually happens behind the scenes.
First, the plumbing usually needs to move or get reconfigured, since shower drains and tub drains aren’t always in the same spot. Then comes waterproofing, which is the step that matters most and gets skipped most often by budget renovators. A proper waterproofing membrane goes under the tile, with correct slope toward the drain, to make sure water never reaches your subfloor or the ceiling below.
After that, it’s framing (if you’re changing the footprint), tiling, glass installation, and fixtures. A straightforward conversion can take one to two weeks, while a curbless or wet room conversion takes longer due to the floor work involved.
The waterproofing step is non-negotiable. A leak behind the wall or under the floor is the kind of problem that doesn’t show up until it’s already caused damage, which is why this isn’t a spot to cut corners.
It’s also worth thinking about resale before you convert. If your home only has one bathroom, keeping some form of bathing option, even a smaller soaker tub elsewhere in the house, can matter to future buyers. For homes with more than one bathroom, converting the main or ensuite tub to a walk-in shower is usually a safe bet either way.
Design Your Walk-In Shower (Free GTA Consult)
Whether you’re picturing a sleek doorless design, a small-bathroom makeover, or a fully accessible curbless shower, the next step is a proper look at your space. We’ll check your plumbing layout, floor structure, and bathroom size to figure out what design works best for you.
Tdot Build has built custom walk-in showers across Toronto and the GTA for over 20 years, with proper waterproofing behind every tile. Check out our Bathroom Renovation services to see real examples, or get in touch for a free design consult.
Call us at (416) 835-9940, or reach out through our Contact page to book your consultation.
Frequently Asked Questions
What is the best design for a walk-in shower?
It depends on your bathroom size. Frameless glass works great for small spaces, while curbless entry with a bench suits larger bathrooms or aging-in-place needs. There’s no single best design, just the right fit for your space.
What are the disadvantages of a walk-in shower?
The main ones are potential splash and heat retention without a door, no soaking tub option, and a higher upfront cost, especially for curbless designs that need floor work.
Do doorless walk-in showers get cold or splash?
They can if they’re not planned properly. Correct shower head placement, entry width, and floor slope prevent most splash issues, and heat retention can be managed with proper ventilation and heated flooring if needed.
Can a walk-in shower work in a small bathroom?
Yes, and it’s one of the best ways to make a small bathroom feel bigger. Frameless glass, light tile, and a corner layout all help maximize the space.
Are curbless showers good for aging in place?
Yes, they’re one of the best accessibility upgrades you can make. No step means no trip hazard, and paired with grab bars and a bench, it’s both safe and stylish.
What’s involved in converting a tub to a walk-in shower?
Plumbing adjustments, waterproofing with a proper membrane, framing if needed, then tile and glass installation. Waterproofing is the most important step and shouldn’t be rushed.
What are the latest walk-in shower trends?
Large-format tile, frameless glass with black hardware, linear drains, and curbless entries are all trending right now, along with wet rooms in larger bathrooms.
Ready to design your own walk-in shower? Reach out to Tdot Build for a free consult, and let’s find the right layout for your bathroom.